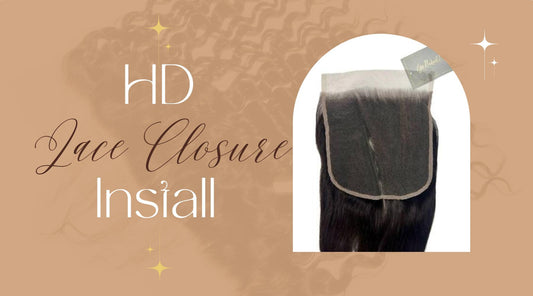
How to Secure Your Closure Wig for a Flawless Finish
Share
Let's be real — there's nothing worse than feeling nervous about your wig shifting, whether you're at a cookout or on a first date.
Luckily for you, we've got all the insider tips you need to keep your closure wig.
Looking chef's kiss perfect all day long.

Why You Need This Guide
A perfectly secured wig isn't just about looking fabulous; it's about feeling confident enough to live your best life without constantly checking your reflection.
And honestly, that kind of confidence is priceless. Below, we share several methods that you can use to secure your closure wig, both with and without glue.
Preparing Your Natural Hair
Before you try any closure installation technique, your natural hair needs to be completely flat and protected.
Here's what you'll need to ensure this:
Essential Prep Steps:
- Start with clean, dry hair.
- Section your hair precisely (more on this below)
- Have your tools ready: thread, needle, wig cap, and styling products.
- Keep a good mirror, and make sure you're in a well-lit area, preferably with lots of natural light coming in.

Method 1: The Classic Cornrow Base
This technique is great if you want a super-flat finish that looks natural from every angle.
- Part and Section: Start by creating your desired parting. It could be the classic and versatile middle parting or a flip-ready side part. Whichever one you choose, use a rat-tail comb for this step so you can get a precise parting that'll translate beautifully once your wig is installed.
- Create Your Braids: Start by dividing the hair into two equal sections. Create 8-10 horizontal cornrows on each side, working your way up from bottom to top. Be sure to add a thread to each braid as you go to help the style last longer. Keep in mind that smaller braids will result in a flatter finish.
- Protect and Prep: Apply scalp oil to protect and moisturize your natural hair. Then, carefully secure a wig cap over your braids to create a smooth base.
Finally, apply some foundation to the lace for a seamless, natural-looking blend between the wig and your skin.

Method 2: The Circular Braid Technique
If you want to switch up your installation method, try the circular braid technique.
It's super easy. All you have to do is braid your hair in a circular pattern around your head and pin it as needed to make sure that each section of the braid lies flat against your scalp.
Then, run your fingers gently over the completed style to check for any lumps or bumps that need to be smoothed out.

The Actual Install
Installing a closure wig is easier than you think.
In fact, closure wigs are typically easier to install because of how seamlessly they cover the entire top of your head.
Here are two simple methods you can use to quickly secure your wig:
The Classic Sew-In
This method goes well with the circular braid prep technique and makes for an ultra-secure, couldn't-move-if-it-tried sew-in installation:
- First, take your closure wig and position it carefully where you want it to sit.
- Next, grab a sturdy thread that matches your wig color and thread your needle.
- Once your needle is ready, sew around the edge of the wig, attaching it securely to the first braid underneath.
- As you finish sewing, make sure to tie double knots to keep everything firmly in place, then simply trim away any extra thread that's sticking out.
Going Glueless
Not feeling the whole sewing situation?
Here's your no-glue guide to securing a closure wig. It works well with the classic cornrow base, with the only caveat being that you have to make sure that your cornrows are laying flat and position the wig just right.
- Place the wig carefully, making sure that it's aligned with your natural hairline. Trim any excess lace that's visible along the hairline. You'll want to work in small sections following a zig-zag motion.
- Use wig clips or combs (if your unit has them) for added security.
- To style the wig, hot comb the hair in sections and consider skipping the baby hairs to achieve a more natural finish.
Finally, lightly mist your edges with hairspray for a subtle hold that won't make the hairline look stiff or overly styled.
Why Go Glueless?
- Perfect for sensitive scalps
- Easier removal process
- No residue or cleanup is needed
- Healthier for your hairline
How Long Will It Last?
Let's talk longevity.
Sew-ins typically last for about 6-8 weeks, while the glueless method might need more frequent adjustments.
Of course, it'll last longer if you take care of it, so be sure to follow these hair maintenance and styling tips:

Maintenance
Wrap your hair before going to bed to keep it from getting tangled, and always use a silk or satin pillowcase to reduce friction and frizz.
Also, you should only refresh your styling when you notice it's needed, as over-styling can stress the hair and reduce its natural bounce.
Heat Styling
Work in small sections when using a flat iron, and always use a heat protectant.
It's also important to keep the temperature moderate to save your edges.

Edge Control
Speaking of edges, try to keep the anti-freeze gel to a minimum when styling them and wait for the product to set before styling.
If you want a natural-looking result, use a soft edge brush. If you notice your edges starting to lift, quickly secure them by adding a few extra sewing points where needed or slightly adjusting the wig's position.
It's important to note here that even the most experienced wig wearers can struggle sometimes.
For example, the lace might peek out, or you might notice the wig bunching up at the back. If this happens, you might need to rebrand your base to create flatter, more secure cornrows.
It might also be a good idea to check if your foundation matching needs touching up or consider tinting the lace to better match your skin tone.
On a daily, all you need is a bit of gentle brushing from ends to roots and regular edge touch-ups as needed.
Which Method Is the Best?
You're Team Sew-In if:
- You're all about that set-it-and-forget-it life
- Security is your top priority
- You're active and need your hair to keep up
You're Team Glueless if:
- You love switching up your look
- Your edges are important to you (we get it!)
- You're new to wearing wigs

Wig Game Strong
Here's the thing: whether you choose a sewn-in installation or opt for a glueless approach, the key is to take your time and get the prep done.
With these tried and tested techniques, you'll be able to confidently rock the style you want, knowing it's secure and natural-looking.
After all, the best kind of wig is the one that makes you forget you're wearing one at all and that on perk of endless benefits of closure wigs!


